






Master Guide for Comminuted Patellar Fractures
0. Preoperative Planning & Surgical Strategy
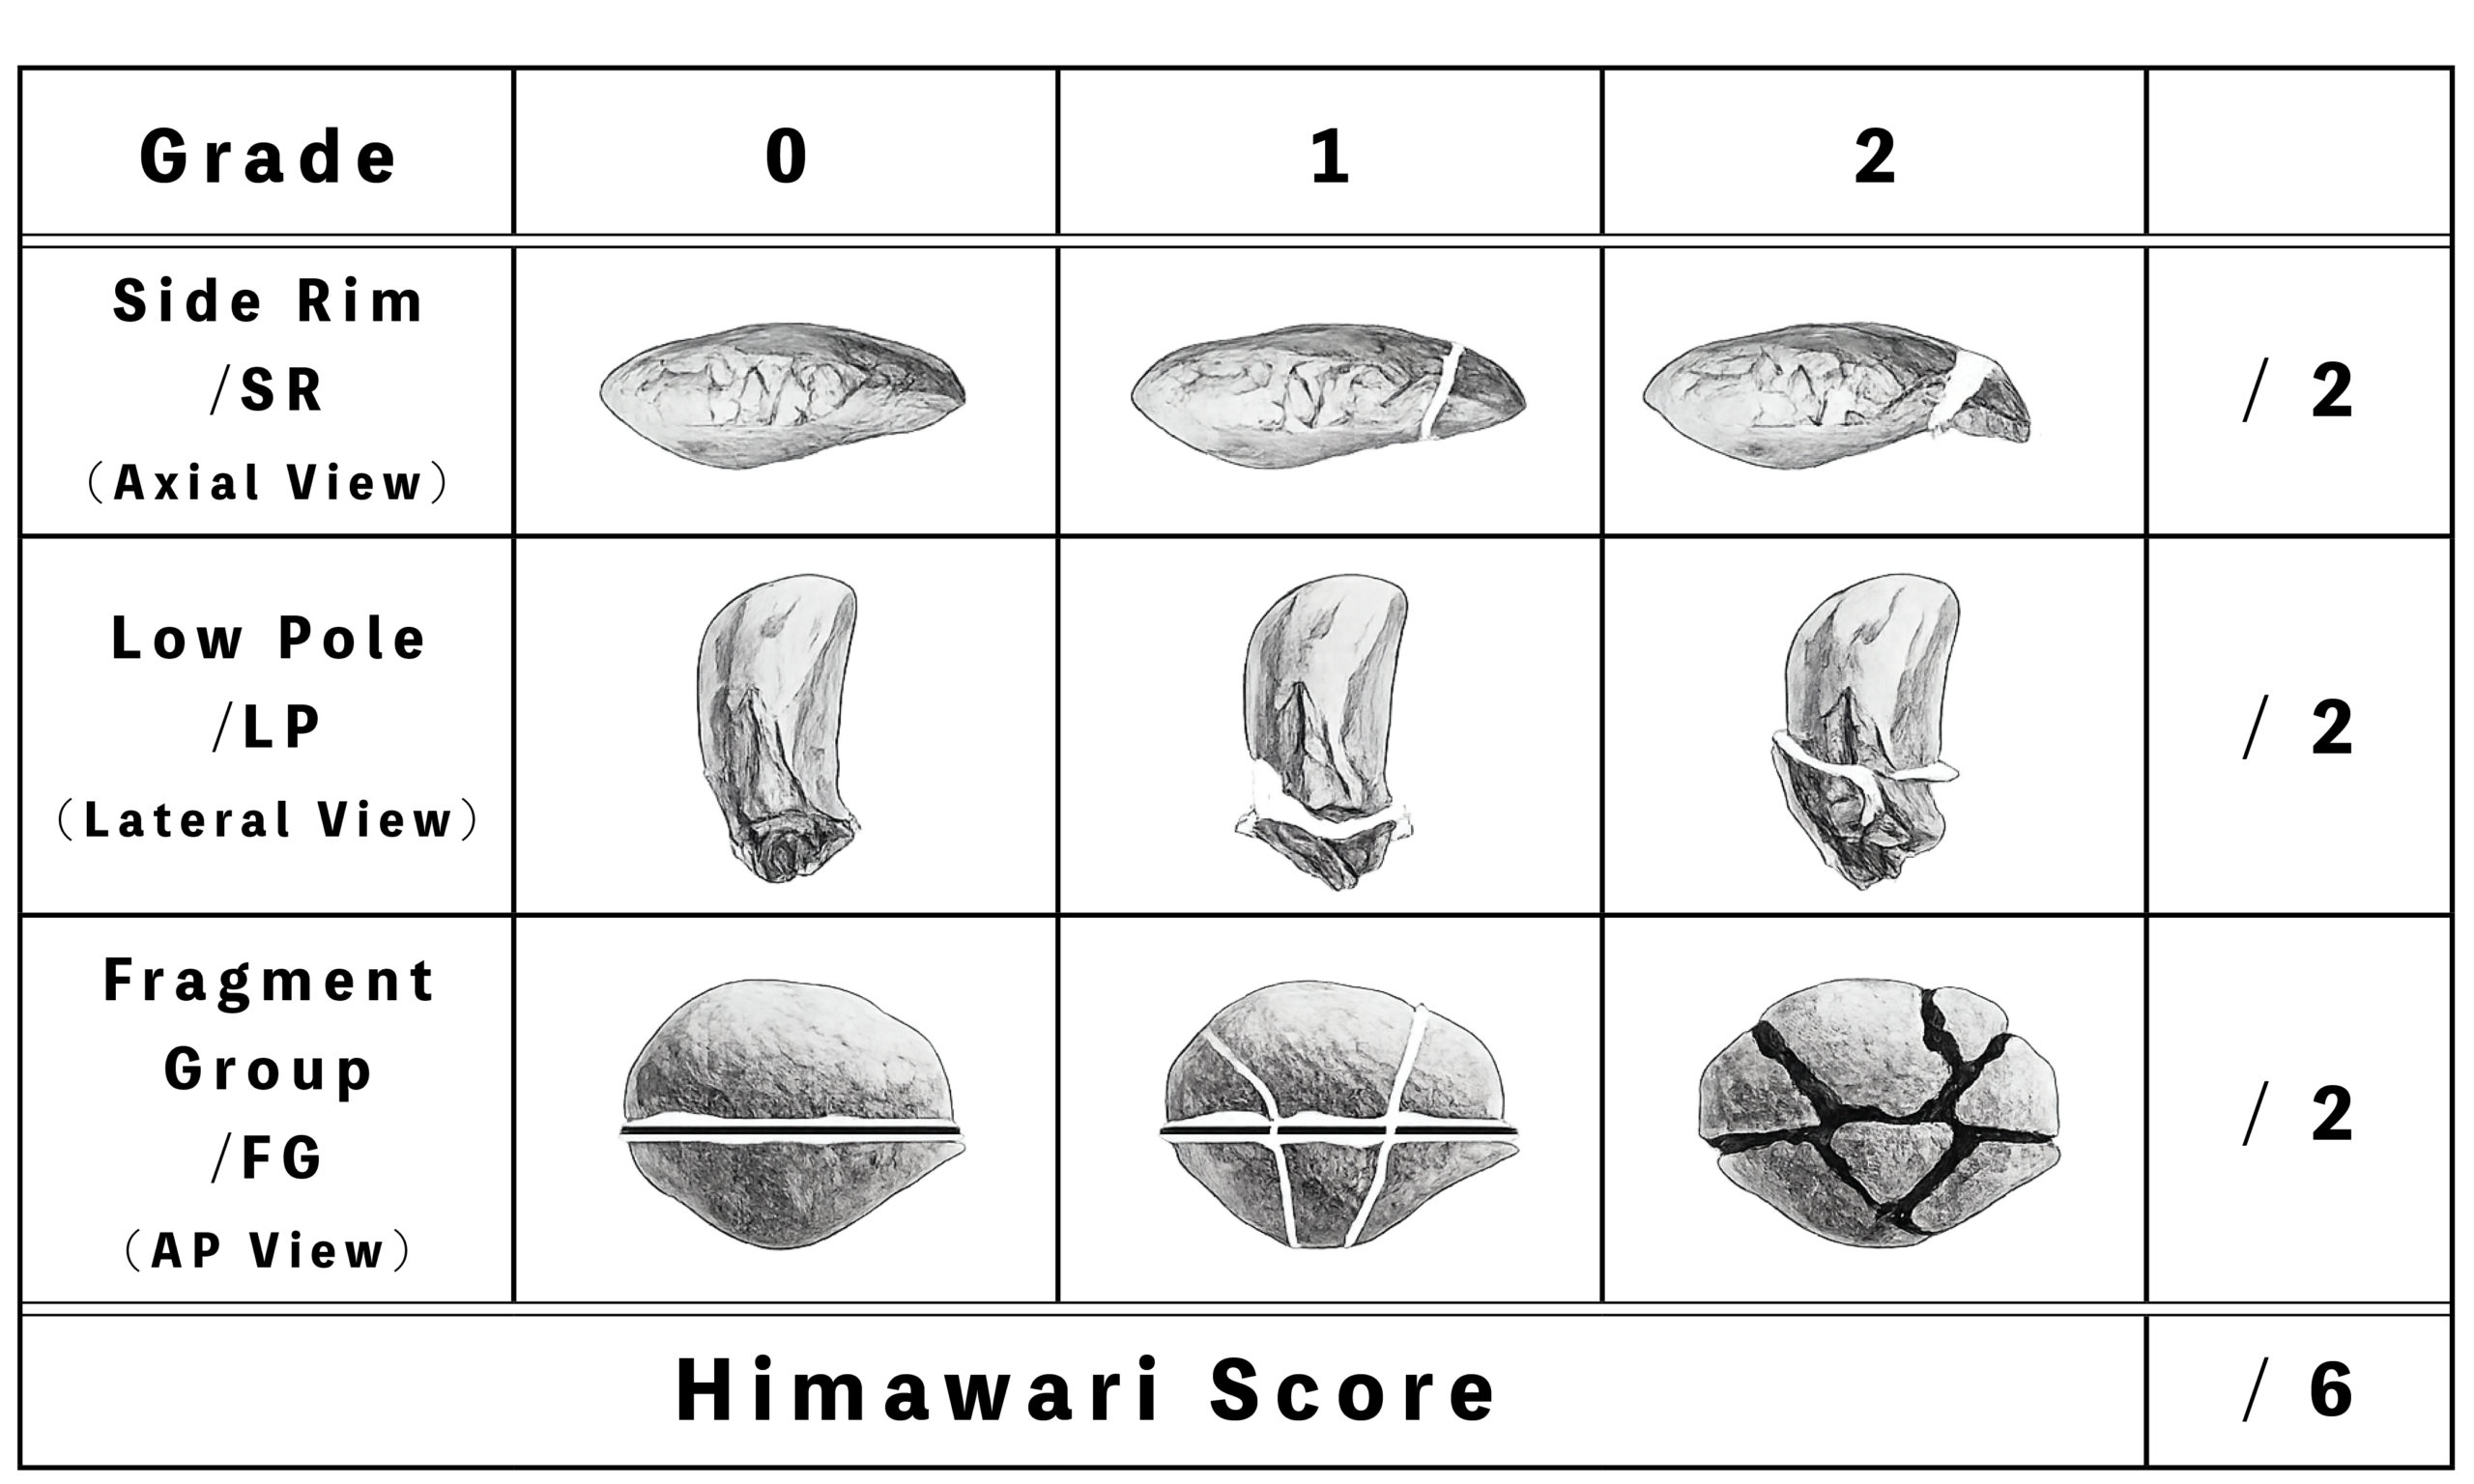
Preoperative planning is crucial for comminuted patellar fractures, and evaluation should be performed using three views: axial, lateral, and anteroposterior radiographs.
Surgical planning is established based on theHimawari Score(Helios Injury Management of Warning Rim score) .
Himawari Score
In the Himawari Score System, grading is determined based on the following factors:
- The degree of displacement of the medial and lateral marginal fragments on the axial view
- The degree of comminution of the inferior pole on the lateral view
- The degree of displacement of the fracture fragment group on the anteroposterior view
In particular, inadequate reduction of the lateral fragment may lead to secondary osteoarthritis in the long term. In cases involving comminution of the inferior pole, careful attention to pin insertion position is essential to prevent postoperative complications such as fragment turnover or redisplacement.
Because the lateral aspect and inferior pole of the patella are covered by soft tissue, it is important to utilize intraoperative fluoroscopy effectively to ensure accurate reduction, fixation, and pin insertion.
1. Patient Positioning, Skin Incision, and Surgical Exposure
Patient Positioning
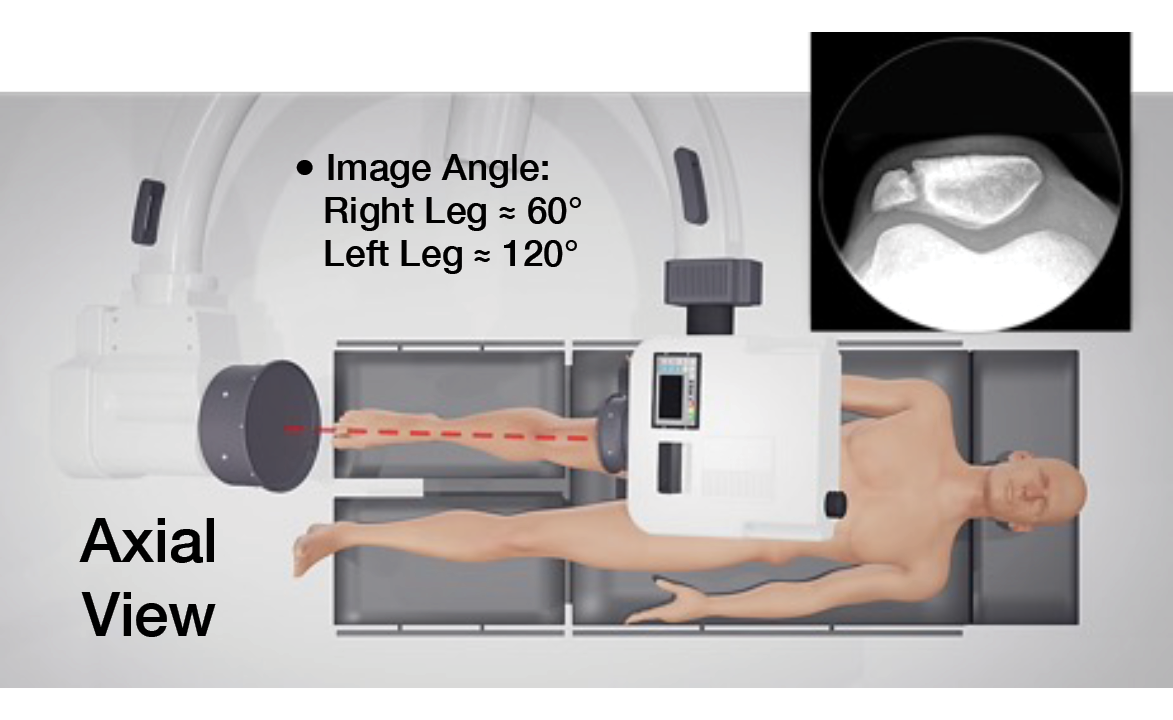
iFAV / Intra-operative Fluoroscopic Axial View
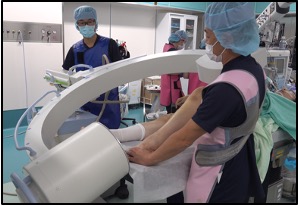
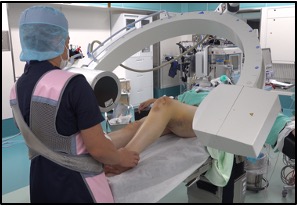
In cases of SR Grade 1 or 2, preoperatively the affected knee is placed in slight flexion while the knee is elevated from below. The ankle is then extended while avoiding interference from the toes by shifting them medially, and the fluoroscopic arm is positioned as close as possible to the edge of the bed. The patient is moved downward until the toes reach the edge of the table. Care should be taken to protect the heel of the contralateral side from compression against the table edge.
During surgery, the assistant stands on the contralateral side and confirms the positioning and angle so that this setup can be reproduced accurately. In addition, the surgical team should confirm with the fluoroscopy operator that, from this position, the lateral view can be obtained by elevating the C-arm, moving it cranially, and rotating it into position.
Skin Incision and Surgical Exposure
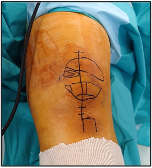
A longitudinal skin incision is recommended, as it facilitates management of the inferior pole of the patella.
The incision should be extended distally to the tibial attachment of the patellar tendon, with meticulous care taken during the procedure to avoid involving or damaging the patellar tendon. An incision of this length is necessary to allow pin insertion from the tip of the inferior pole toward the superior pole of the patella.
In comminuted patellar fractures, the subcutaneous tissue is often significantly damaged. Therefore, it is important to perform sharp dissection down to the periosteum whenever possible and proceed with dissection over the periosteal layer to expose the entire patella.
2. Reduction
FG Grade 1 and 2 Cases
In many cases, the fracture fragments are divided into superior and inferior groups. The superior pole fragments and inferior pole fragments are first reduced separately as groups, and finally the main fragments are aligned using the lateral view. When the main fracture line is vertical, the superior and inferior pole fragments may first be reduced together, followed by reduction of the lateral fragment using the axial view.
Reduction and Pin Insertion of the Lateral Fragment
On the anteroposterior view, the fracture fragments are roughly categorized into groups to determine the sequence of reduction. In many cases, the medial and lateral marginal fragments are first aligned on the axial view to create two larger fragment groups (superior and inferior), followed by reduction using the lateral view.
SR Grade 1 and 2 Cases
In Grade 2 injuries, the lateral fragment is often displaced further laterally with a “bowing” or “tilting” deformity. Accurate restoration of the articular surface is essential, and the iFAV (intra-operative fluoroscopic axial view) should be utilized extensively to ensure precise insertion of the Helios pin.
At this stage, the Helios pin is inserted from the smaller marginal fragment toward the larger main fragment.
Management of Inferior Pole Fragments
LP Grade 1 and 2 Cases
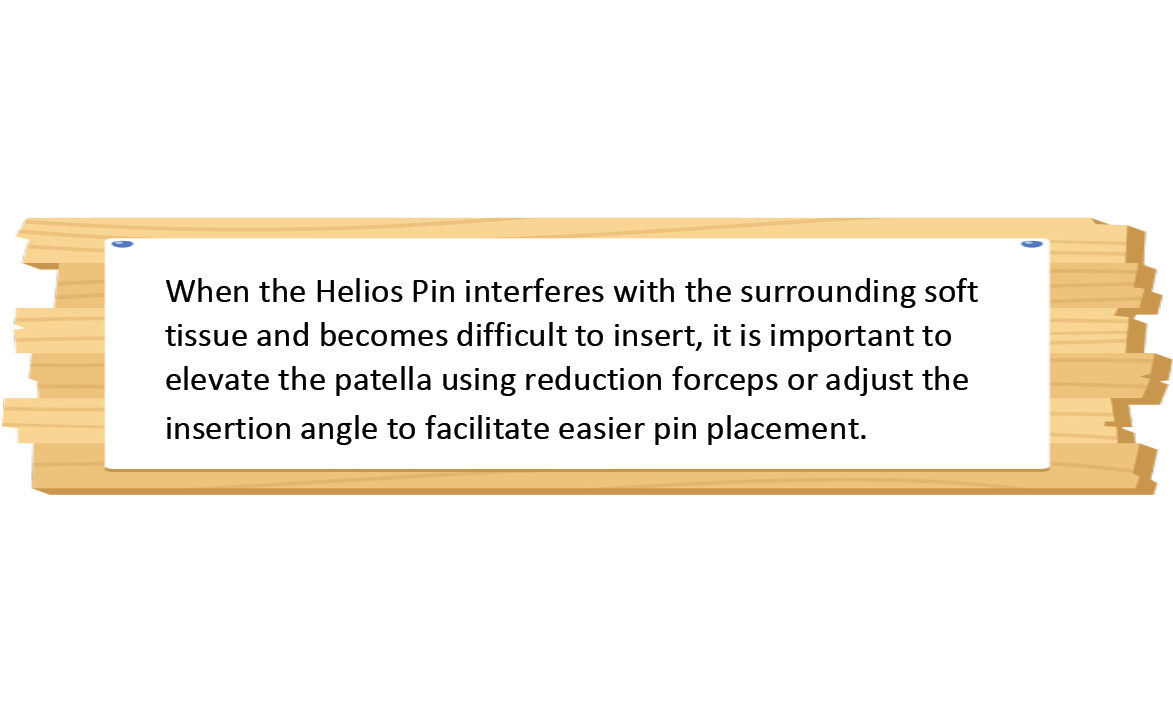
When the fracture line extends to the inferior pole, fluoroscopy should be used to confirm that the Helios pin is inserted from the tip of the inferior pole. The patellar tendon is partially dissected with electrocautery to secure the pin insertion site. Furthermore, when the fragment is split in the anterior–posterior direction, it is important to place the pin within the deeper fragment.
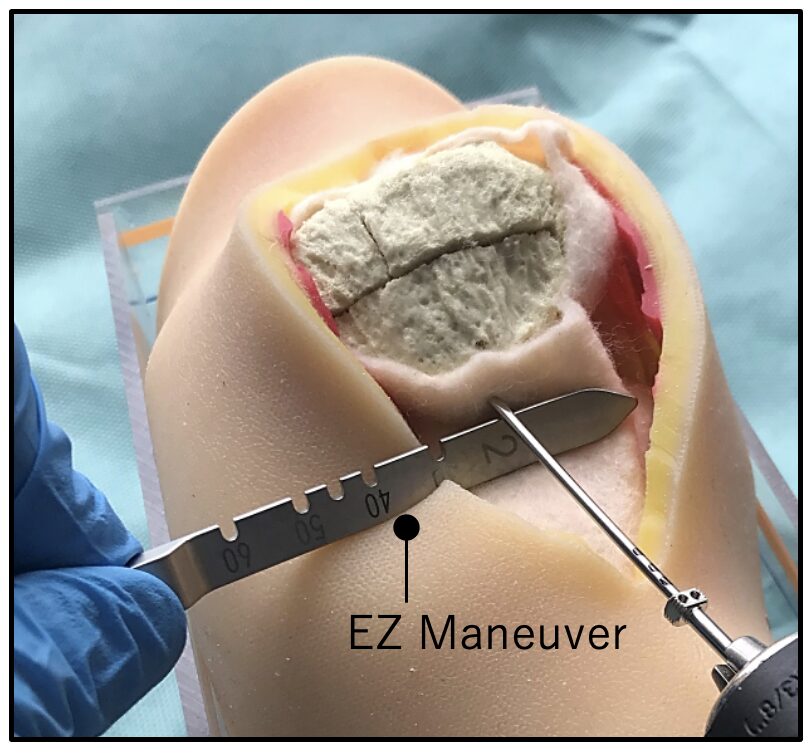
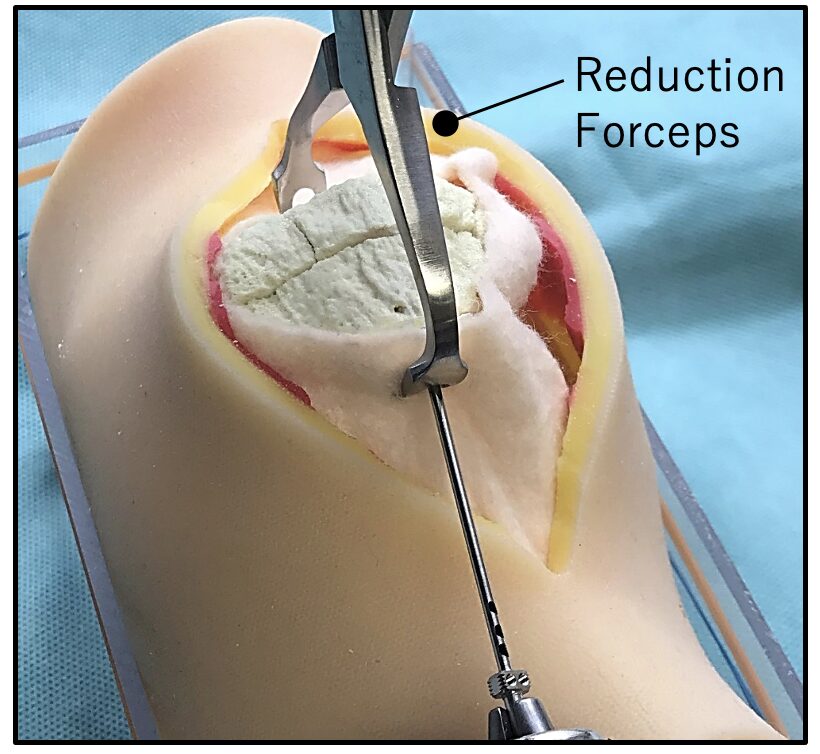
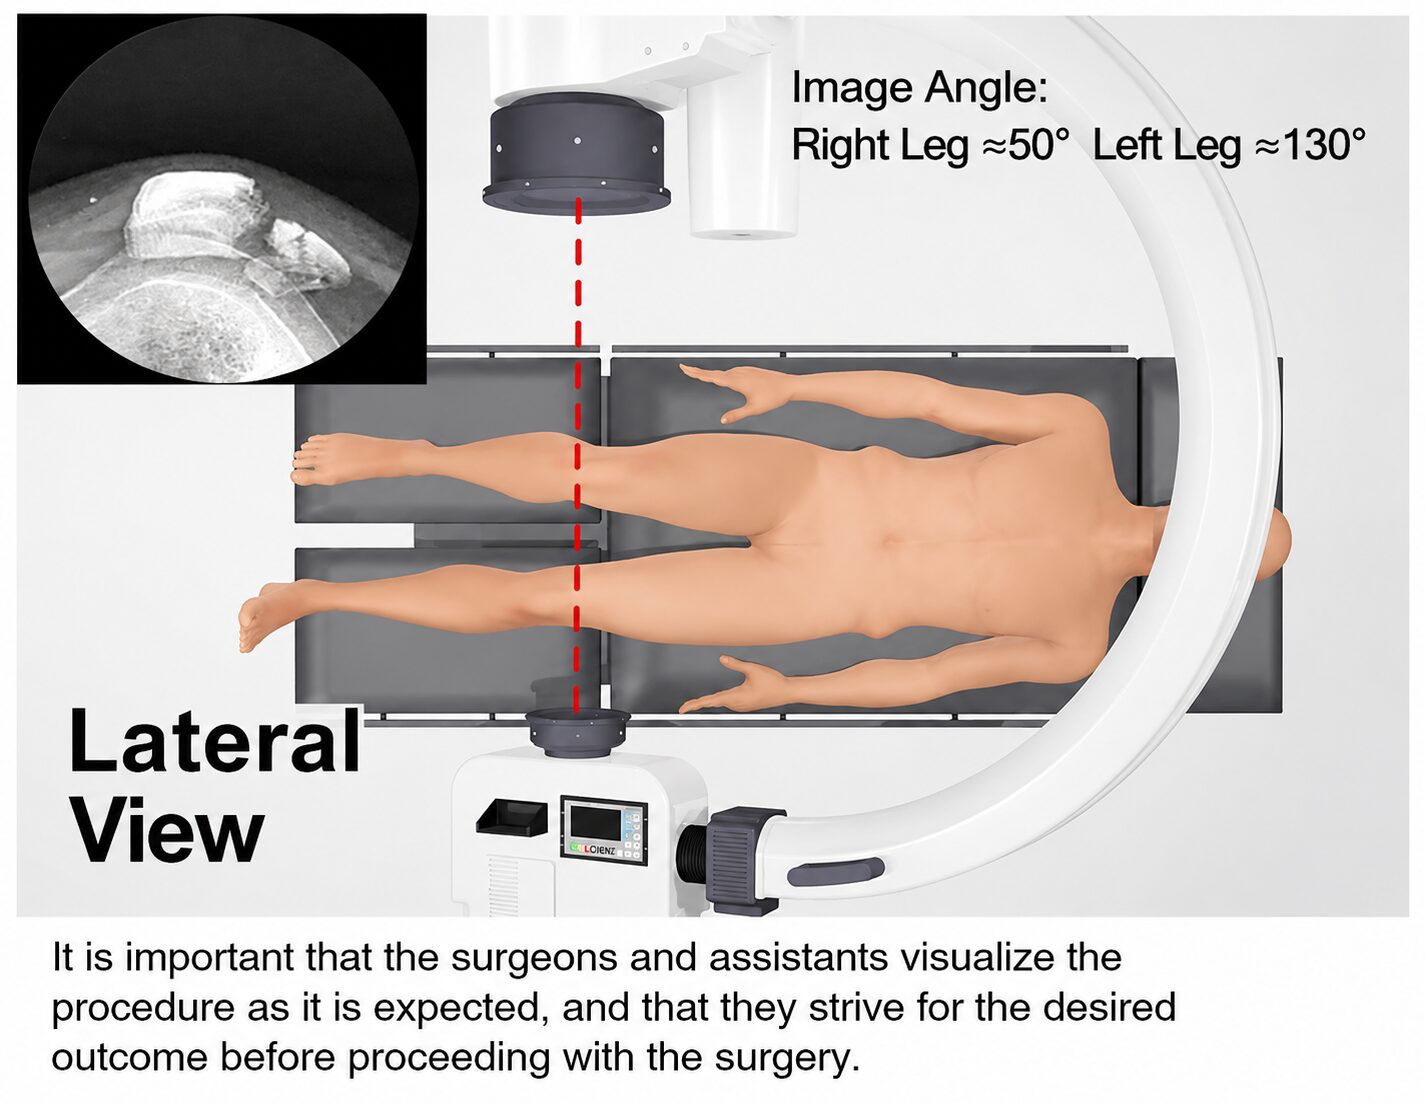
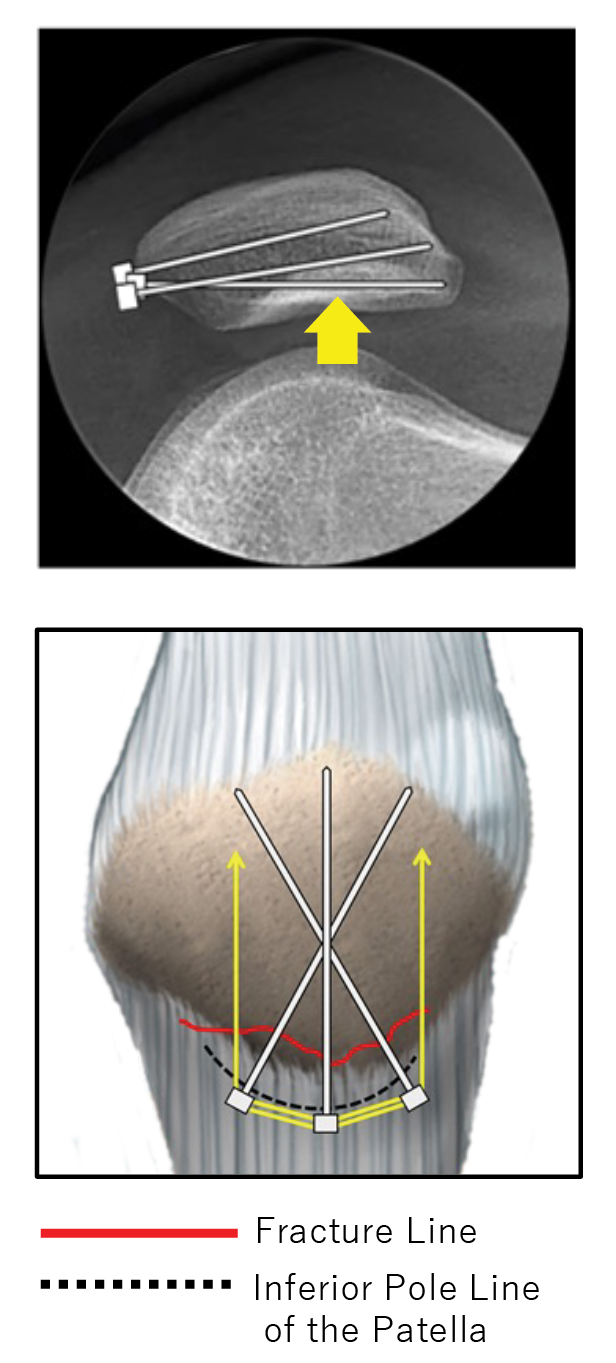
Because inferior pole fragments are subjected to distal traction forces from the patellar tendon, insertion of two or more Helios pins in a crossed configuration rather than in parallel provides greater resistance to pull-out stress.
In addition, when not only the inferior pole fragment but also central fragments are split in the anterior–posterior direction, the Helios pin should be placed within the deeper fragment while aiming as close as possible to the articular surface (yellow arrow).
Furthermore, when the inferior pole is severely comminuted or consists of thin, fragile fragments, soft tissue dissection should be minimized, and the Helios pin should be inserted directly through the comminuted fragment. Even if fixation strength to the bone itself is limited, the pin can serve as an anchor, allowing the cable to be secured circumferentially and anteriorly to stabilize the surrounding soft tissue complex as a whole.
At this stage, an additional technique may also be used in which a Krackow stitch is placed in the patellar tendon, passed through the intramedullary canal across the fracture site, and brought out through the superior pole for fixation. Using an 18-gauge needle to guide the suture allows Helios pin insertion without cutting the thread.
Assessment of the Articular Surface
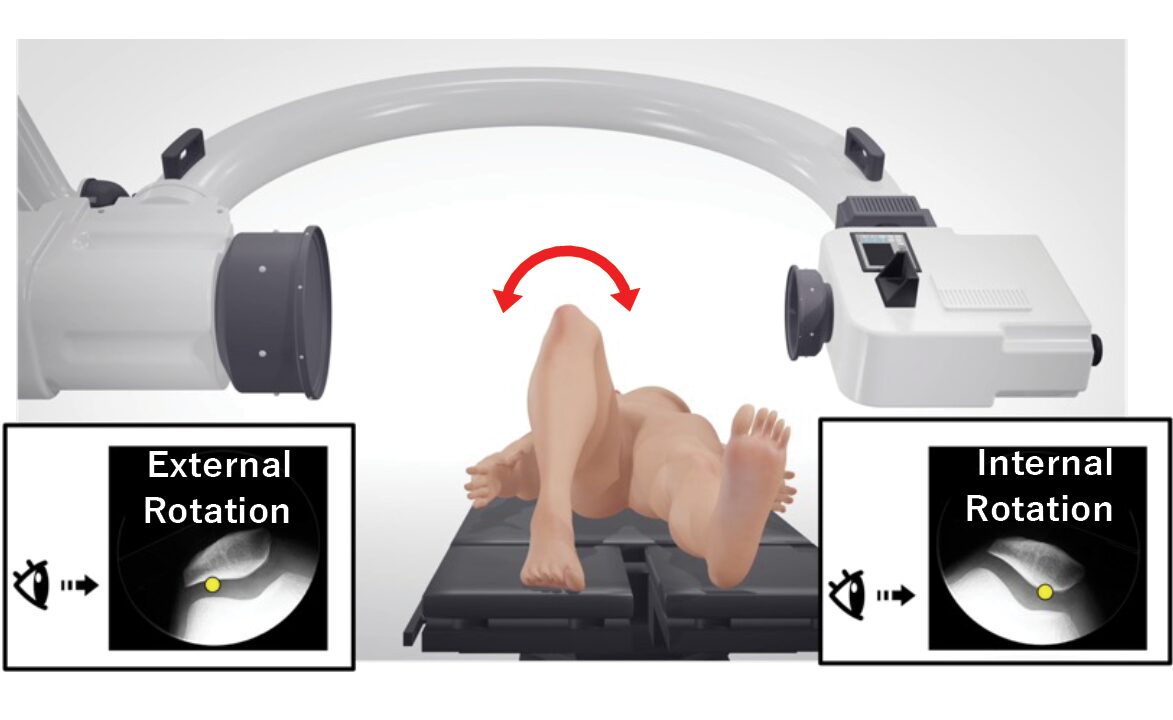
The articular surface can be directly observed to confirm reduction until the superior and inferior fragments are aligned. However, once the fragments have been approximated, it becomes difficult to assess the reduction position directly.
To evaluate congruity of the articular surface, assessment should be performed with the knee in extension using not only the neutral position, but also internal rotation to evaluate the medial articular surface and external rotation to evaluate the lateral articular surface. This is important to confirm that the fragments have not been reduced with rotational malalignment.
3. Circumferential Fixation
Pin Insertion
In the Himawari Method, the pin sleeve does not need to be tightly attached directly to the bone after stripping the soft tissue. It is acceptable for the sleeve to remain slightly elevated from the bone by the thickness of the surrounding soft tissue. However, the sleeve should be inserted sufficiently so that it does not interfere with the soft tissue during knee flexion and extension.
Circumferential Cable Fixation
First, the cable is passed through the hole of the deeper sleeve from the side opposite to the most unstable fragment. The cable is then routed circumferentially around the patella and brought back to terminate at the same location.
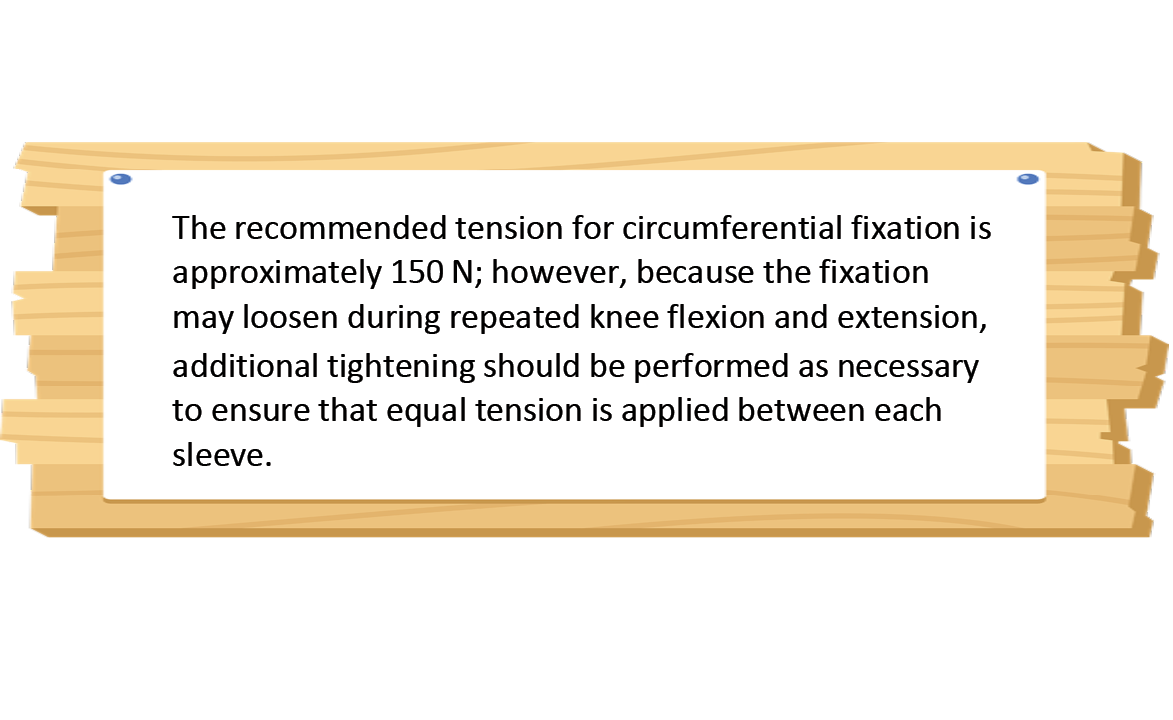
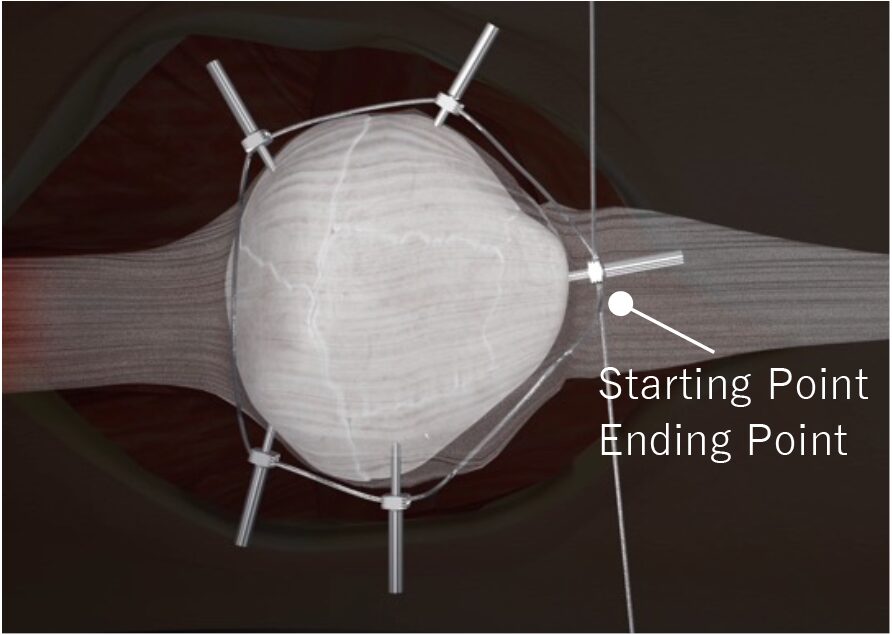
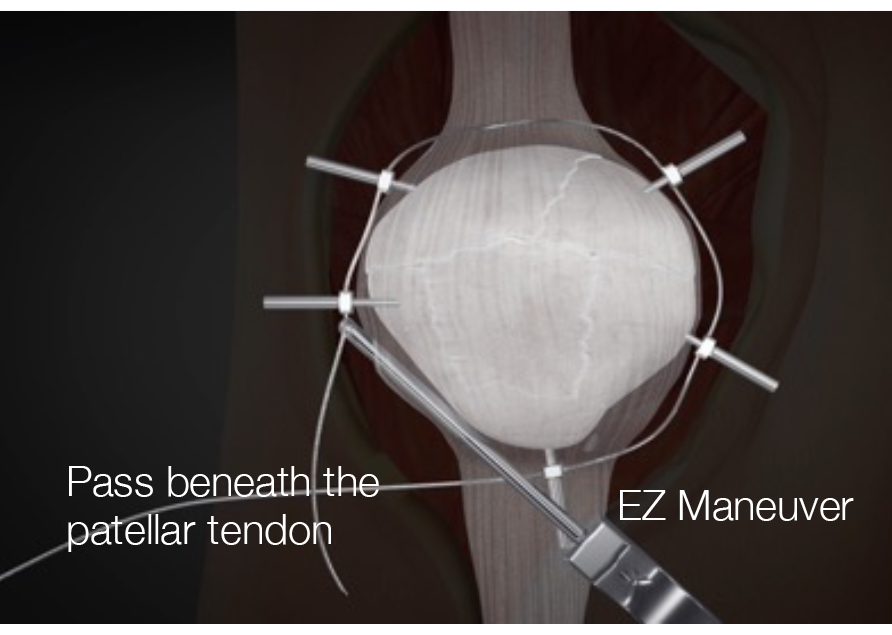
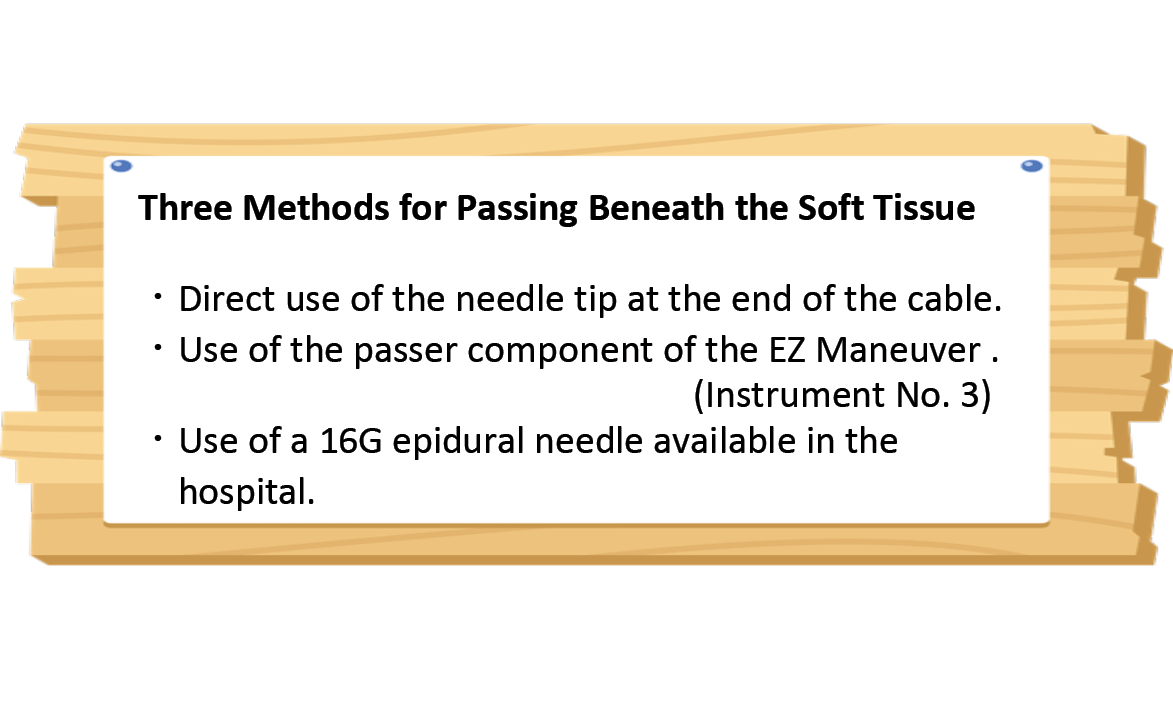
The EZ Maneuver is extremely effective when passing the cable. When routing the cable beneath the soft tissue or through the sleeve, guiding the cable into the EZ Maneuver at the sleeve exit allows smooth passage without interference from the surrounding soft tissue.
Compression Fixation
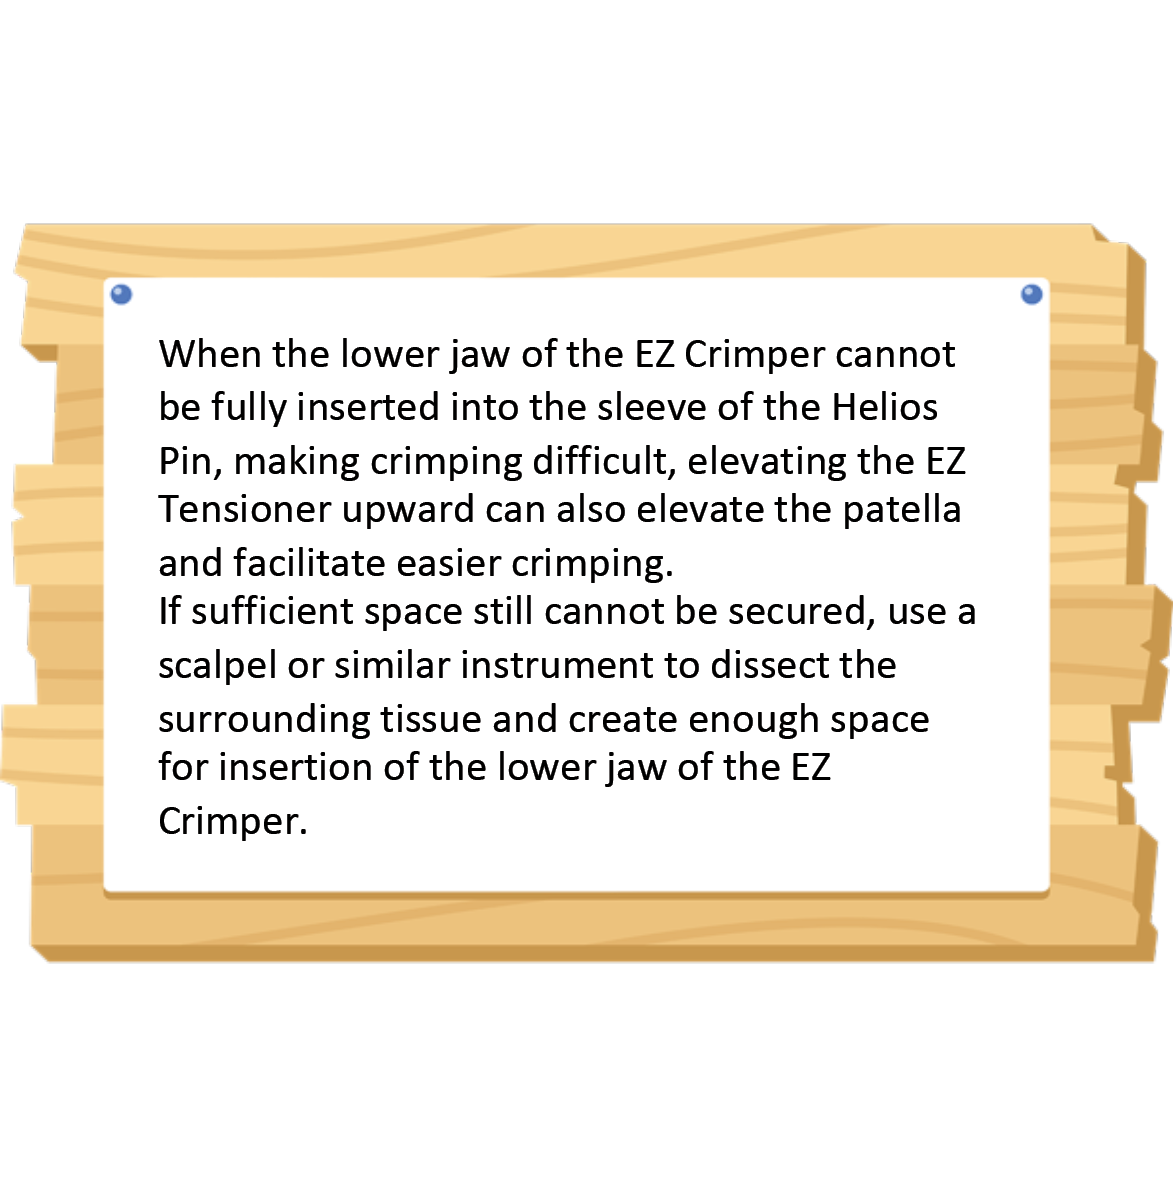
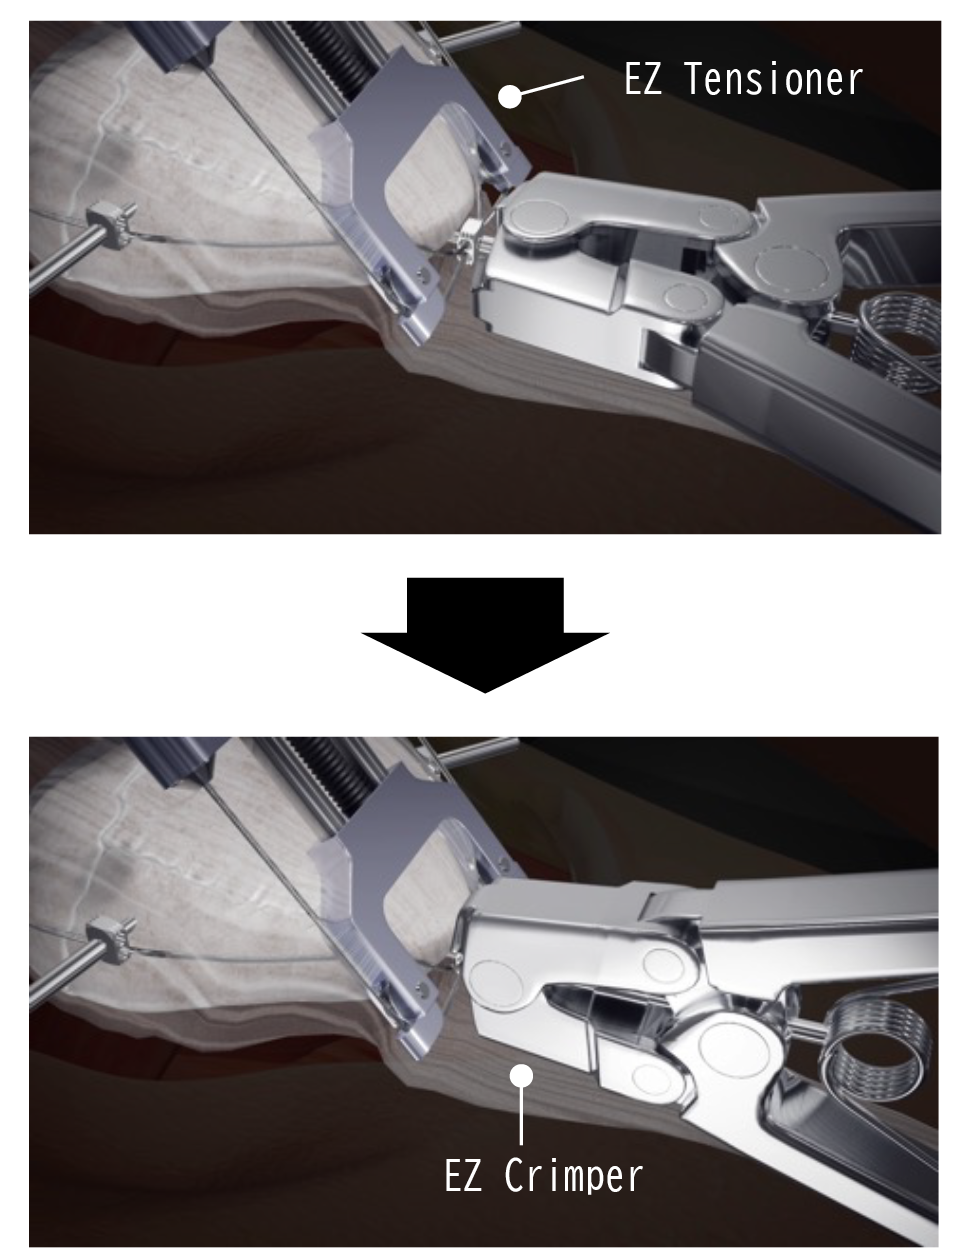
After inserting the EZ Crimper horizontally relative to the operating table, compression is facilitated by raising the instrument upright to grasp the pin sleeve. Before crimping the sleeve, ensure that the EZ Crimper is firmly advanced until the stopper comes into contact with the sleeve.
4. Anterior Fixation
Anterior Cable Fixation
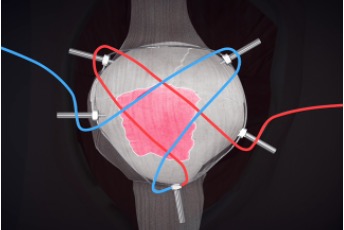
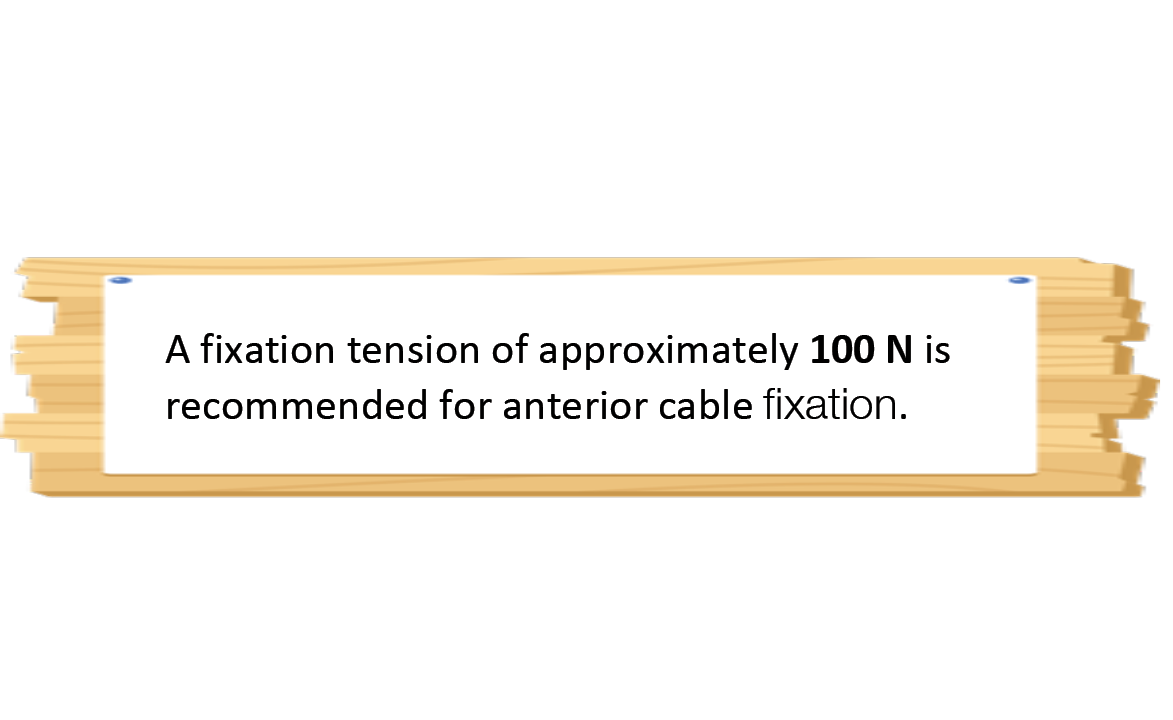
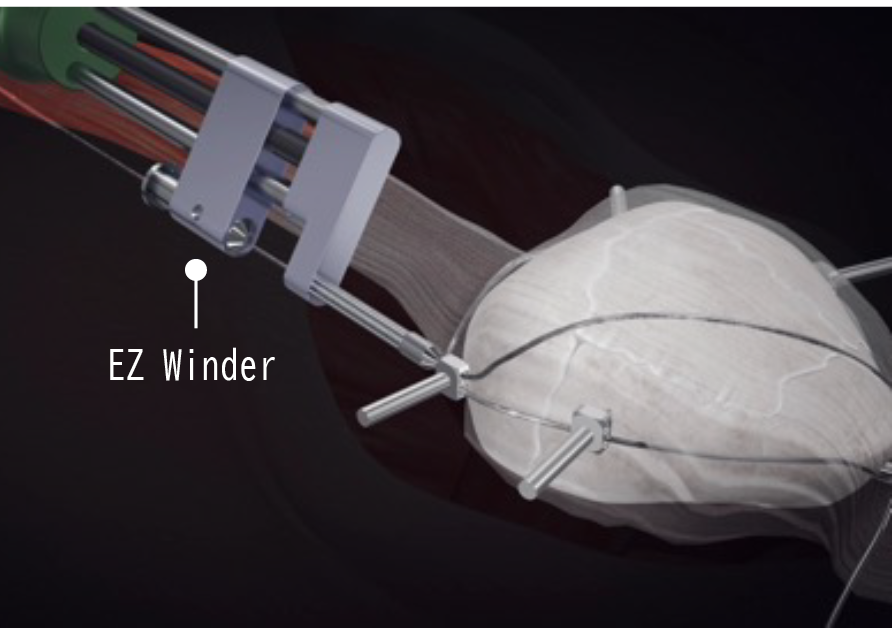
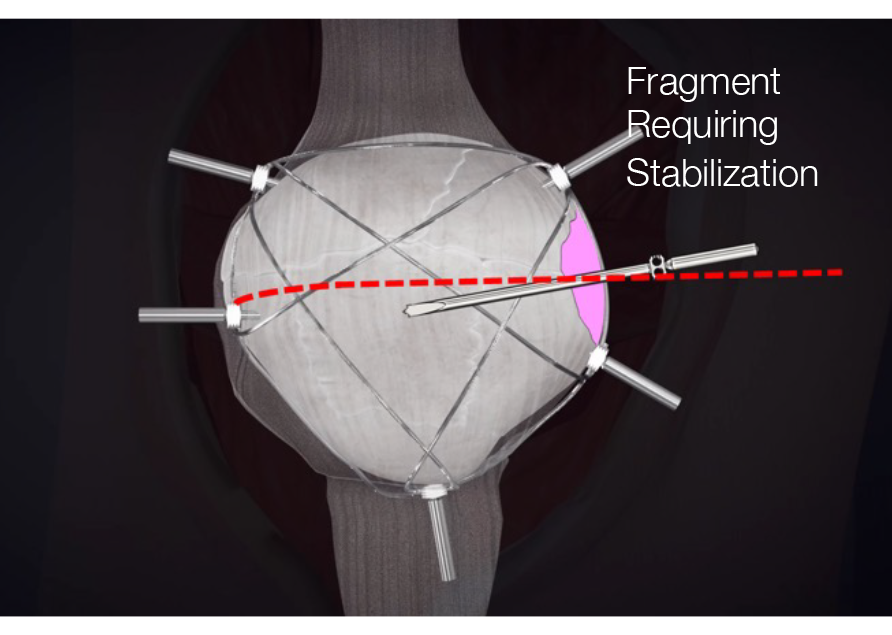
By passing the remaining cable along the anterior aspect of the contralateral sleeve, anterior fixation of the patella can be achieved. Simulate the cable routing around the anterior surface of the patella to determine the configuration that provides the greatest fixation stability. It is important to ensure that the cable is positioned over all fracture fragments.
Perform flexion and extension of the knee joint to confirm the stability of the fracture fragments on the anterior surface of the patella. If any fragments requiring additional stabilization remain, insert an additional Helios pin at a position where anterior cable fixation can be applied to that fragment, and perform supplementary anterior fixation.
Cable Cutting and Removal of the Crimp Handle
After compression fixation of all anterior cable fixations has been completed, cut the remaining cable using the EZ Cutter. Finally, use the EZ Twister to bend the gripping portion of the Helios Pin from side to side until it breaks off.
Avoid bending and breaking the pin posteriorly, as this may cause the Helios Pin to bend backward at the bone exit site, potentially resulting in loosening of the fixation.
5. Postoperative Management
After compression fixation of all anterior cable fixations has been completed, cut the remaining cable using the EZ Cutter. Finally, use the EZ Twister to bend the gripping portion of the Helios pin from side to side until it breaks off.
Avoid bending and breaking the pin dorsally, as this may cause the Helios pin to bend posteriorly at the bone exit site, potentially loosening the fixation.
Please note that specifications may be partially modified without prior notice as we continuously pursue research and product improvement.
For detailed information about our products or any inquiries, please contact us via the “Contact Us ” page.
A representative will get back to you shortly.
For more information about the Himawari Method Surgical Instruments (Helios Locking Pin Sleeve System), please click here.